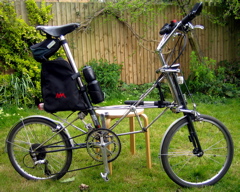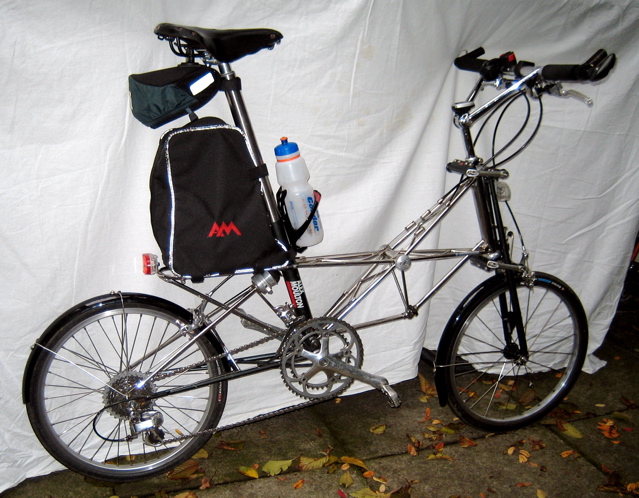
It's a September 2000 model Moulton NS stainless. I bought it from Peter Evans in 2005. This model had the narrow 120 mm rear dropouts but Peter somehow managed to reduce the width of a Shimano 600 hub to 125mm which just fits, so it has a standard Shimano 11-32 9 speed hub. This together with the 55-39 front rings gives ratios of 22-92 ins. [Now fitted with an Ultegra rear hub, also narrowed to 125 mm and with an 11-32 cassette.]
The bike soon after I bought it:
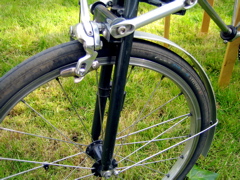
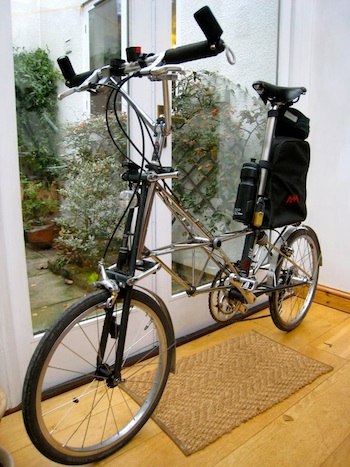
In December 2010, showing DIY alloy mudguards and ScottOiler - see below for details
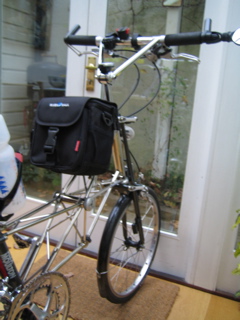
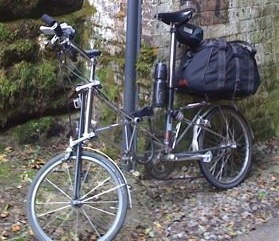
With the large rear bag fully loaded on a tour in Cornwall 2009 (with apologies for the low-res image):
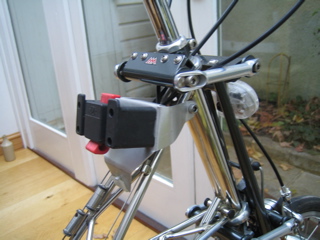
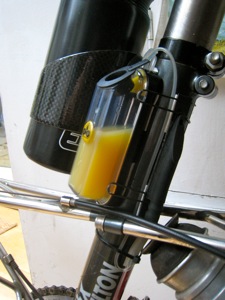
The on-board chain lubrication system recommended by many Moultoneers and others. I have mounted the reservoir and the 'squid' on the seat tube behind the water bottle:
Click on the image for more photos
Although they looked good and did the job well for a while, these guards were ultimately a failure – both of them fractured within a couple of thousand miles and I conclude that ali strip is too brittle to cope with the very strong vibrations of Moulton suspended wheels with high-pressure tyres (110 psi). I have gone over to using a pair of polypropylene Raleigh Junior 'guards (visible in some of these photos), which are proving more reliable - still in good shape after several thousand miles.
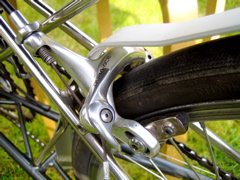
I had been struggling with keeping the wheels running freely with standard mudguards because of the incredibly small clearance under the rear Dura Ace brake caliper. As you can see in the 3rd photo, with Stelvio tyres it's about 5 mm even without a mudguard!
The aluminium mudguards are thanks to John Bartlett's generosity in donating the strips that he happened to have amongst the amazing collection of Moultons and bits in his sheds. I spent a pleasant hour or two with John testing the idea with the benefit of his experience and skill and finished the job at home.
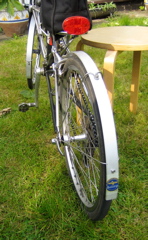
Routeing the rear guard looks unconventional but it gives the maximum possible clearance and seems the only practical solution. I'm quite satisfied with the look of them.
|
|
|
|
|
|
|
|
|
~1.5 m x Aluminium strip |
2.2 mm thickness, 28 mm wide, profiled like this: |
|
|
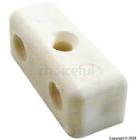
1 x plastic fixing block |
As used to join panels of ply, etc. drilled through two holes in one direction and one hole orthogonal to them |
|
|
Rivets and rivet gun |
To attach front mudguard to plastic block |
Forming:
I cut aluminium strip to length
based on another pair of mudguards. I made them 3-4 centimetres
longer than standard to obviate the need for mudflaps. Rear guard
requires extra material to go over brake caliper and down to the
chainstays. I used a wheel as a former to bend the strip roughly to
shape. Bending the bridge over the rear brake done by eye with the
strip in a vice.
Fitting:
I used the stays from my old plastic
mudguards. Drilled the guards to take the bolts. Positioning the
stays was an issue, I'm not sure I got it quite right see below. The
rear guard bolts directly to the threaded hole on the X-member on the
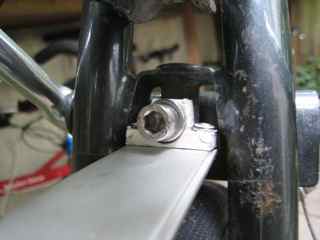
rear triangle. The front guard must be bolted to the rear of the
front fork at the threaded hole provided. This joint has proved
problematic but I think I have a durable solution now using a
cut-down plasticjoinery fixing block. See the last photo in the
series above.
1. The mudguards sometimes flex so much that they touch the wheel. This is not a serious problem, but it is not ideal. Solutions would be to use slightly thicker aluminium strip or additional stays.
2. Fixing the front mudguard to the fork. My first approach was to bend a short right-angled section of the ali strip, narrow it to fit the fork and drill it to take the bolt. This worked well, but the ali strip fractured at the bend after a few hundred miles of use. My second attempt was to use a mild steel L-bracket. This lasted only a little longer. The next approach was to use the plastic block shown. But my first attempt with that resulted in an obstruction to the front suspension travel so that the bike seemed to be bottoming very frequently. It was only after shaping the plastic block into a T as shown in the last photo above that I got a satisfactory result. This has lasted a couple of thousand miles so far with no looseness or rattles.
I was lucky enough to be given some strip thas almost perfect for the job by John Bartlett. Before I spoke to John about it I had scoured the internet without finding a UK source. John tells me that this material is supplied for the fabrication of office door labels (!). Ideally it would be slightly thicker, say 3mm, to obviate the flexing mentioned above - Bill Gobie has reported success in avoiding the problem with that thickness. If anyone can find a source - please let the Yahoo Moulton list know about it. There might even be enough interest for a bulk purchase.
I like to have a separate, click-mounted small bag for camera and valuables when touring. A conventional Klickfix handlebar bag is impossible to fit with wishbone stem and handlebar bags are deprecated on Moultons, hence this solution.
The bag is a Rixen and Kaul 'Alllrounder Mini' (w/d/h 15x12x18cm) which I bought for 53.90 Euros including delivery from www.metostrade.net . (Email them first, they speak English and were very helpful about payment using Paypal).
The bracket holding the Klickfix mount is a simple aluminium one originally used to hold a different barbag on the front of an AM. I had to modify (bend) it only slightly to install it like this on the NS. It does the job, but I hope to replace it with a purpose-designed bracket which would hold the bag about 2 cms lower and slightly more inclined. I find the bag doesn't obstruct my legs for pedalling or for mounting the bike. A wider bag would probably be ok, as long as it was no thicker.
Fitted Spring 2006. Used 2-3 times to date.
|
|
|